Well this is the second part of our glass painted table project and takes us through the painting.
Having finished this project now I must say how much I’ve enjoyed it. Creating a much larger functional item feels very different from making small sun catchers! I’m not saying making sun catchers isn’t fun. It’s just that a large piece like this gives you an extra sense of achievement.
I find the painting a much more relaxed part of the project than the outlining. The outlining (covered in the last article/video) was quite difficult. This was particularly apparent with the chess board where every little error stood out like a soar thumb. However getting a good standard of finish to your outlining means the painting part is fairly simple.
Glass Painted Table.
Materials and Equipment.
- Craft Knife.
- Paint Brushes.
- Glass Paints
- Glass Paints (Colours to suit).
- Kitchen Towel.
- A Design. (A cop of the design we used can be downloaded from our Projects Designs section if you would like it.

Technique.
- First thing to do is to make sure your work is still clean. You will want to do this each time you return to the painting. It’s surprising how hairs, dust and other bit can find their way onto your wok.
- I like to start in the center and with darker colours, working my way to the outside. With this is mind I started with the dark chess board squares. I didn’t want to use single colours especial with either black or white, both of which tend to be quite opaque. So instead I chose a blend of black and red for the dark tiles, red to compliment the red dragons.
- After finishing the dark tiles I left them to dry and then moved on to the light tiles. The colours for these were white and the lighter green from the dragons.
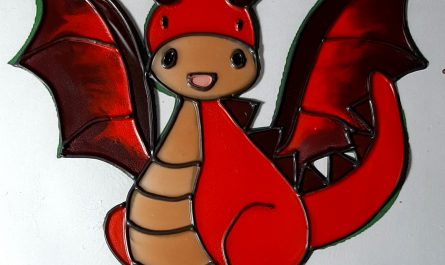
- Next were the dragons themselves. These a split into two. First doing the darker colours and blends. Once that was dry I did the lighter colours. The was all made easier by the fact I had painted a “test dragon” right at the beginning of the project. This meant I knew what colours I wanted to do different parts of the dragons. 2 Dragons were do in Red/Orange and two in Dark Green/Light Green. Both also had brown (feet and ?????) and Blue (Eyes) on them.
- The final bit to do was the background for the dragons. Luckily the design is basically broken into quarters so it was possible to take a break between each section. If there hadn’t been clear breaks then we would have had to paint the whole thing in one go. You can’t let the paint dry in an unfinished section or you will have a join point in your paint.Obviously before I started painting the background I once again removed any hairs, dust and spots of dropped paint.
- After the painting was finished I wanted to give it a couple of days to harden completely before I did anything with it. This time I spent painting the table frame with Hammerite.

Summery.
As I said I really enjoyed this project although with all the preparation and waiting for paint to dry it did seem to take a long time.
The preparation was really important. The design needed to be precise and I’m really glad I did a test piece with both a dragon and chess square on.
When doing the squares there were a few important things which you need to remember. Firstly, once again ensure you test your colour scheme . Not only do you need to sort out the colour choice but you also need to wok out the proportions of each paint. And the second point is related to that. Ensure you put the same amount of each paint in each square and in the same order so you get a consistent look. Each time with the black and red squares I put the black in first, roughly 3 drops and then topped up with red. It also seemed important to put the two colours along side each other and nudge them into each other rather than dropping one colour on top of the other.
I strongly recommend that every glass painter tries a larger project every now and them. Technically it is no more difficult than doing smaller projects but it does give you a real sense of achievement.


