 by
by 
Well there are lots of names for these; window stickers, peelies, window clings. Whatever you call them this article will show you how to go about making window stickers with glass paint.
These stickers can be added to and taken of a window whenever you want. This makes them ideal of Christmas decorations or decorations for other event throughout the year. More practically they can be used to stop birds flying into windows or children (or adults) into patio doors!
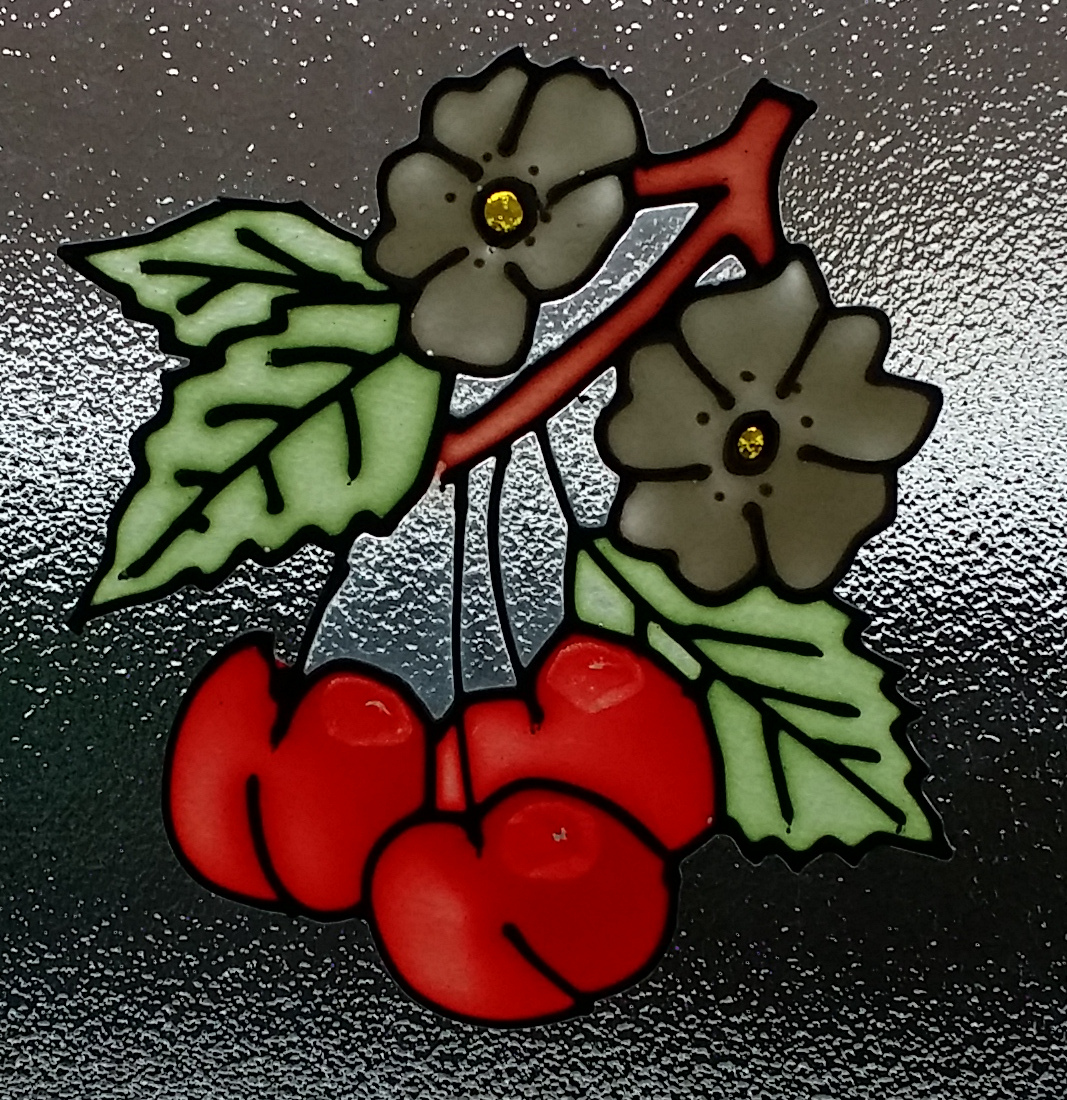
They can be made using virtually any design, a favorite character, a warnings sign, father Christmas, an Easter Bunny, animals, birds, flowers etc etc.

Making Window Stickers with Glass Paint.
Equipment you will need.
Peelable Window Paints. (Sometimes called “Pipe and Peel” paints.)
Peelable Outliner.
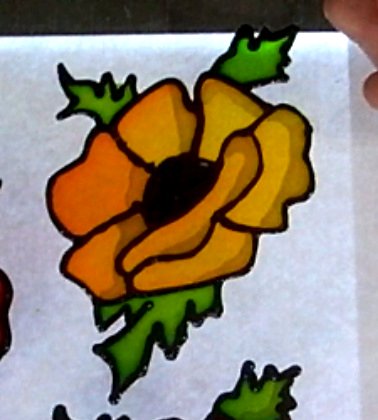
A Design. (we can’t share all the designs we used as some are copyright. You will find the ones we can share in our designs section together with some others suitable for Window Stickers / Peelies).
Paint Brush.
Something to paint onto. (We recommend either a silicone sheet or “Punched Pocket” (make sure it’s a clear smooth one).
[Please be careful with the silicone sheets as we found our had “something” on it which caused problems with the finished peelies sticking. A good wash in hot soapy water seemed to sort it].
Technique.
Place your design under the mat or in the pocket. Add something like a board or piece of perspex to stiffen it. You may want to hold these all together with making tape so nothing moves whilst working on it.
Pipe the outline using the peelable outliner. Leave for 2 or 3 hours at least to dry.

Now paint the design. Leave one colour to dry before you paint a different colour next to it. Ensure the paint goes right up to the outliner with no gaps. Ensure your piece is totally flat both when painting and drying. Fill any small gaps with clear peelable glass paint.
Leave overnight to dry completely.
Peel the finished piece off your mat or pocket. This may be difficult the first time so should be done slowly and carefully. Try pulling on the outline more than the paint. (after the first time peeling it off it will become a lot easier).
You should now be able to press it onto a window, mirror or a pocket (for storing).
Issues you may face.
If you tear the peelie at any time don’t worry. Simply return it to your mat or pocket and repaint the area which has torn. You will need to leave it overnight again to dry.
If it stops sticking the just wipe the back with a damp cloth. This should make it stick again.
Getting More out of the technique.
There are many things you can do to add an extra dimension to your peelies. Many of the designs we do only have a single colour per section but there is no reason why you can’t use multiple colours in the same section.
You can build a larger image on a window using multiple separate peelies.
We hope you enjoy making these Window Stickers/Peelies. Why not share some of your creation in our Facebook group.


I really enjoyed tutorial but the background music was really a bit too loud. I will be trying this out today. Many thanks for the video.
Glad you liked it and many thanks for the comment. I’m afraid there isn’t much I can do for this video but I will take that into account in future.
Let us know how you get on!
My clings come out too thin. I’ve tried using more glue and applied thicker amounts of paint and still no luck! Any suggestions? Thank you
Not really sure why this is happening unless it’s the glue. Have you tried doing two layers (paint, leave to dry, paint again. Never tried it myself but I would have though it would be OK (unless the dired layer has issue with new paint being put on top).