by
by 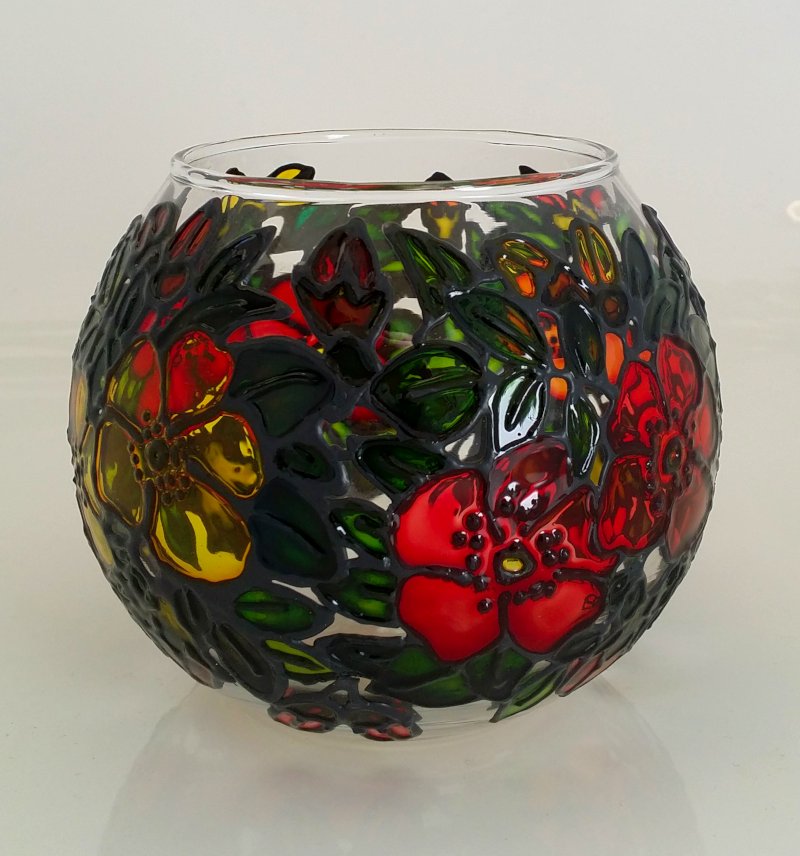
We all know that glass painting on curved surfaces can be difficult and this glass painted round vase was no different. Whilst it will never be easy we do have a few hints and tips which will make it less difficult for you.
The biggest problem for this project was the amount of time it took to do. The actual painting time was probably only an hours or so but that had to be spread over two weeks to allow for drying time. There is really no way to speed this up so just relax and accept it is going to be a long project. Nothing to stop you doing other projects whilst waiting for this on to dry!
Glass Painted Round vase.

Materials and Equipment.
- Peelable Outliner.
- Grease-proof Paper (for piping bag).
- Plastic binder wallet to pipe onto.
- Paints. (Your choice for colours and brand. I used Pebeo Vitrail).
- Paint Brushes.
- Hairdryer.
- Vase.
- Craft Knife.
- Design. (You will find the design we used HERE.)
- Lights (optional).


Method.
Outlining:
- First I worked out that I could get 4 copies of my design around the vase which left a bit of a gap between each.
- Next I outlined the design 4 times on the plastic wallet)s_ using the peelable outliner. I left out any bits which weren’t attached to other and any “odd” single lines.
- Cleaned the Glass.
- After leaving the outliner to dry I peeled the designs off the plastic and placed them equally around the vase. (As I used peelable outliner it re-stuck to the glass without any problem.
- Next I went back to piping. Adding in the bits I had previously left off and adding extra leaves and buds in the gaps between the designs. I filled out each of the 4 gaps so it ended up being a continuous design around the vase.
- I left it all to dry overnight .
Painting.
- Placing the vase on top of a round tape dispenser to keep it still I worked out my first few painting areas.
- I warmed the first area up with the hairdryer and started painting. The “trick” was to use as little paint as possible whilst still getting a smooth finish.
- After completing each small area I would leave it to go tacky dry (about an hour in my hoses temperature) before moving the vase either round or up or down a little. I then repeated the process of painting a small area again. Normally just one or two sections of the design.
- The flowers were quite large (relativity speaking) so I had purposefully placed the “dots” in the design so I could use them as a break and treat each flower as 5 separate areas (the four petals and the centre.
- I repeated the painting process again and again over 2 weeks until the whole vase was painted.
- When painting there were time I “found” small reas of outlining which I wasn’t happy with. I cut these out and re-piped them. Painting somewhere else until the outliner was dry.

That is basically it. I’ve mentioned the tips above but will state them again.
Tips for glass painting on curved surfaces.
- Choose a “complicated” design. One with lots of small section. This will mean the paint doesn’t have too far to run.
- Each time, before you start painting, warm the glass up in the section you are going to do. This will mean the oaint dries quicker and has less time to run. Don’t make it too hot or you will cause issues both for the paint which is going on AND for the areas you have already painted.
- Use as little paint as you can get away with whilst still getting a smooth finish.
- Accept that you are going to get areas which are “shaded” sightly, e.g. more paint on one side than the other.
- Paint a small area at a time e.g. one or two segments of your design (Obviously with the vase turned so that area is at the top). Leave that to go at least tacky dry and the move the vase so an adjacent section is at the top and repeat. (By painting an adjacent section it means to bit which is tacky dry won’t be move to too steep an angle giving it even more time to dry).
Summery.
I enjoyed making this vase but it really did seem to take forever to do. It’s just the way it is with painting on curved surfaces. The longer you take, the smaller the areas you are painting, the better the finish will be.