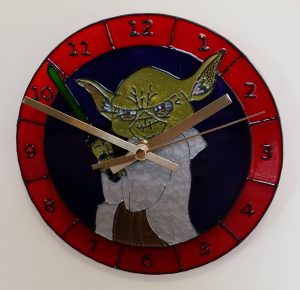
Glass Painted Clock Project.
This glass painted clock project covers both wall and self standing clocks. These both make great presents and you can alter the design to suit just about anyones interests. Two of the designs we use in the project video and photos are covered by copyright so we are unable to supply them for download. If you like them you should be able to find similar on the Internet and we will be making the basic clock template available minus the center design. In fact we have made a couple available, one with numbers and one with the Zodiac symbols.
The project has been made using our Ex-Thick film. If you can’t get hold of this you will need a thick plastic material which:
- Is strong enough to hold the clock mechanism.
- Doesn’t react to the paint.
- Can be cut with scissors.
- Is bendable (if you want to make the self standing clock.

Materials and Equipment.
- A4 Sheet of Ex-Thick Film (or similar).
- Black Outliner. (Plus other colours as required).
- Glass Paints.
- Clock mechanism and hands.
- Scissors.
- Paint Brush.
- Template/Design.
Instructions.

The projects follows the normal pattern for basic glass painting with a couple of extra bits thrown in.
- Peel off the white cover from the Ex-thick film.
- Use the template to mark the center hole in and then drill it using a countersink bit. Remove any burs with a craft knife.
- .Glue the design/template onto the back of the Ex-thick film using PVA glue. (The back of the film is the side which still has a protective clear cover on. Remember to line up the hole you drilled with the hole marked on the template.).
- Leave the template to dry and then cut out your clock shape.
- Outline the design using black outliner.
- Paint the design using the flood fill technique. Leave one colour to go at least tacky dry before you paint the space next to it. (I used opaque paints in the middle so the clock mechanism wouldn’t be seen when placed behind.
- Once the paint has dried add any over piping you may want on your clock.
- Add the clock mechanism and cut down the hands if necessary.

Summery.
You can have great fun with this project and basically put whatever design you want in the middle. You could make a special Christmas Clock or maybe add the date to a clock celebrating a special event. Whatever you choose we hope you enjoy the Glass Painted Clock project. As normal, once you have read these instructions I strongly suggest you watch the video. There is a lot more in it and it does tend to make things a bit clearer.
If you would like to download basic clock templates please see here: Project Designs section.


