by
by

This glass painted chess table project is rather large so we will be splitting it into 2 posts and two videos.
This isn’t really an item I set out to make. I saw the table for sale on a local Facebook group and knew I could do “something with it but wasn’t really sure what. This is what happens sometimes. There are occasions when you know what you want to make and gather the items to make it. Other times you come across an item which you know it suitable for glass painting and develop a project around it. Local Facebook groups, second hand shops, car-boot sales etc are all good places to look for items.
I’ve wanted to do a glass painted chess board for a while and this item provided the perfect opportunity. Not quite sure where the idea of having dragons round it came from but it is a theme I use quite often.
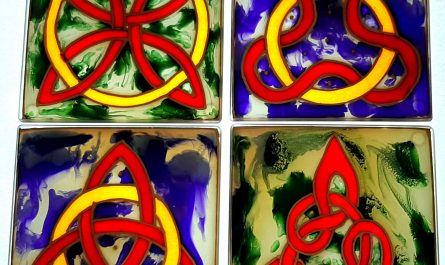
Glass Painted Chess Table.
Creating the design.
I did all the work for the design on the computer using a program called GIMP (a really good, free graphics program). You can obviously do your designs by hand if you prefer but I find a computer better for designs recurring elements and straight lines.
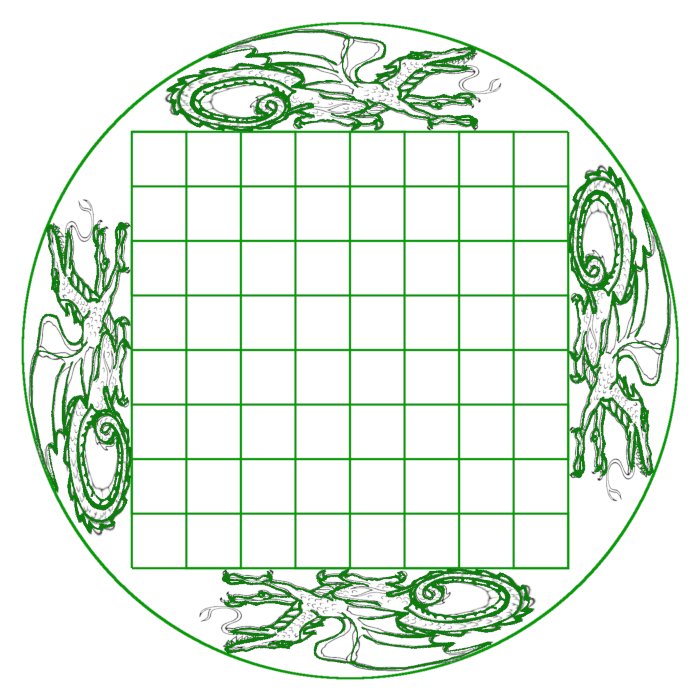
First I created the basic chess board design, full size. The enabled me to see how much space I had left for other elements. The basic dragon design is one I found online and then adapted. This was done by importing it into my main design then manipulating it so it was about the correct size. I exported this out of the design and printed it off as a template. Next I pipped that template making more changes to the design and then photographed it. The next step was to paint this and photograph it again. That gave me an opportunity to see how the colours should look on the final piece. Finally I imported both the pipped and coloured photographs into my design so I could make both a template and an image of what the final piece should look like (roughly).
I know this all seems like a lot of hassle to go through but it really is worth getting the design right, especially in something which is so crucial about size etc.
Working on the outline.
- Clean the glass.
- Blu-tack the design under the glass.
- Pipe the chess board. Any errors should be left to dry, cut out, then done again.
- I then put a strip of adhesive lead around the outside of the glass/design. I could have used liquid lead but I though it better to have something stronger in this position.
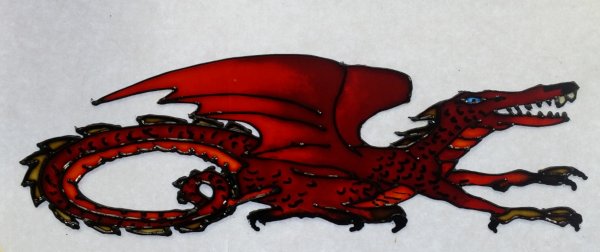
- Next I pipped the four dragons. These were actually simpler to do than the chess board as there is a little leeway with errors (whereas the chessboard shows up every little error you do.
- The last step was to use a pen to add the detail to the dragon. mainly scales, eyes and claws. This need to be a special pen. We used a paint marker by Zeyar (bought off Ebay). You will find further details in are articles on using a Pen in Glass Painting HERE and HERE.
Conclusion.
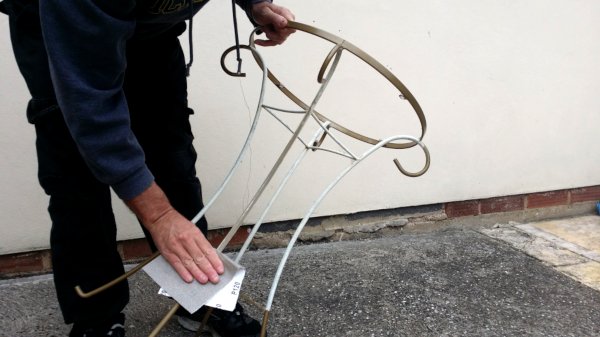
So that is the end of this first part of the glass painted chess table project. The piece is now ready for painting. Off camera I have also been working on the base of the table, sanding it all down and removing old paint to get that ready for painting as well. I wasn’t too sure what to do with the base but one of the Facebook members suggested using Hammerite and after a look at a colour chart I’ve decided on the silver.