by
by 
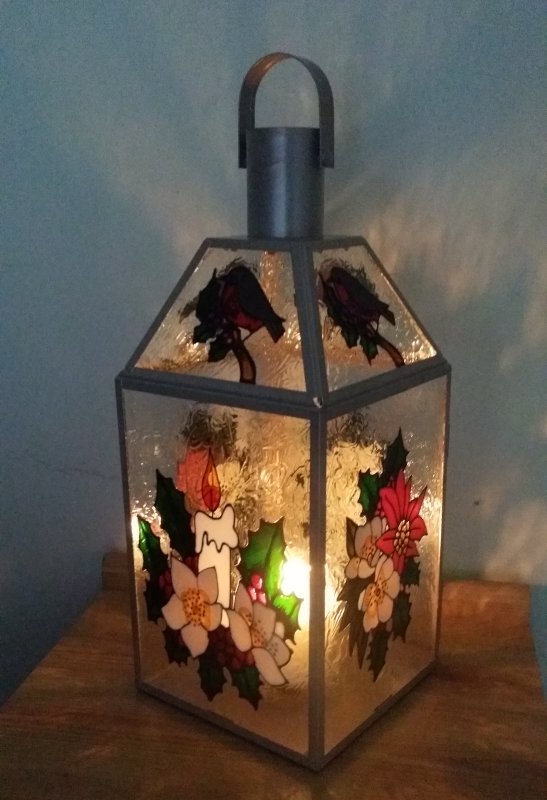
We’ve made this as a Christmas lantern project but with different designs you can use the same techniques to make an “all year lantern”. You could also get another set of glass panels cut (or more) and have different design sets for different times of the year. A Christmas set, an Easter set, maybe even a birthday set!
I say in the video that the lantern came from Matalan but thinking back it may not have. If I remember rightly my wife picked this up for me so it could also have come from Home Bargains or B&M Bargains or any of those types of shop. They all do these lanterns in slightly different sizes and designs. The important thing is to ensure you can get the glass out to work on (this isn’t possible with some of the little wooden ones they sell).With this lantern, like most, all you had to do is bend back some little metal tags and the glass just slid out.
Christmas Lantern Project.

Christmas Lantern Project: Materials and Equipment.
- Lantern.
- Paints to suit your design.
- Clear, thick waterbased glass paint. (Plaid make one in their Gallery Glass range, as do other brands).
- Outliner
- Your Design.
- Paint Brush.
- Blu-tack.
- Tape.
- Boards for putting the glass on.
- Craft Knife
- Grease-proof for piping bag (if you use one).
- Lightbox (if you have one, not necessary).
Method.
Prep.
 Take the glass out of the lantern. If you are going to do your design on the computer you should measure it. If you are going to do your design on paper just draw round it and that will give you the correct size. Be careful. In my lantern one side panel was smaller than the other 3. This was the panel in the “door”. Ensure you take into account any “frame” which overlaps the glass.
- Once you have finished the above clean the glass. I use warm soapy water to get rid of an greasy marks and finger prints, followed by a rinse.
- Tape your design onto a board and the use the blu-tack to fix the glass on top of that.
Outlining.
- Make up your piping bag (if you use one, put in the outliner and cut the end to the required thickness of line. This will vary according to the size of the glass/lantern you are working on. Larger lanterns should have thicker lines, smaller ones finer.
- Outline your panels and leave to dry.
- Once dry go back through the panels cutting out any errors or bit you are unhappy with. Then touch up again with outliner and leave to dry again.
Painting.
- Take the outlined glass off the board and then place it on your lightbox or a sheet of white paper. This will give you the best chance of spotting any gaps on your painting.
- Ensure the glass is flat.
- Paint your panels one colour at a time. Ensure that colour is at least tacky dry before you move on to the next. Start with the darker/stronger colours and work your way up to white.
- Once you have painted all the colours you can do the background. We gave it a mottled look by very roughly putting on a thick waterbased clear glass paint (our particular one was Gallery Glass by Plaid). For most brands this will look white when it is first put on but will dry clear. (If this is hard to picture just take a quick look towards the end of the video). Leave to dry.
- All that remains now is to put the glass back in.
Summery.
Once again this was a really nice project to do. It wasn’t difficult as it was all basic glass painting on flat glass. The lantern I was working on was actually rather large which unsuprisingly made it even easier. You use more paint and outliner but the large version of the designs were easier to outline and paint.
A copy of the designs I used are in our designs gallery under the projects section. You will probably have to fiddle around with them to make them fit your particular lantern but the are jpgs so you should be able to open them in any graphic program.
Don’t forget this doesn’t HAVE to be a Christmas Lantern, you can use other designs, but I do think this will look rather nice in a porch or conservatory over the holidays.