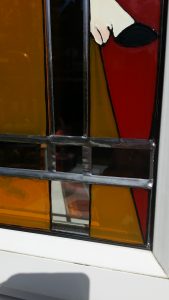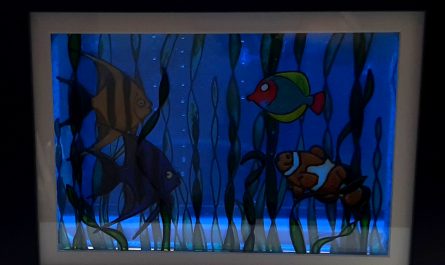
This is the second part of our project on how to make a faux stained glass window. In the first part we made six glass panel to add to our window. These were made with oven bake glass paints. This, we are hoping, will make them weather resistant. The actual paints used were Pebeo Vitrea 160 transparent glass paints and outliner.
The idea was to fix the panels onto the glass using adhesive lead strips.We did intend to use just the 9mm and 4.5mm sizes but, due to any error when measuring up, we did end up using 3mm as well.
At this point I think I need to apologise for the quality of the video. It’s not terrible but it was a case of anything which could go wrong did! I think what we have managed to produce isn’t too bad but it’s not up to our normal standards.
How to make a faux stained glass window. Video.
Technique.
The basic technique used was quite simple. The idea was to put a piece of 4.5mm lead along side each panel, then place a 9mm piece over the top which would go half on the glass panel and half on the 4.5mm strip. Doing it this way would ensure the new panels were stuck onto original window plus there would be no big “dips” in the 9mm lead. (The other way of doing it would be to just use the 9mm lead, putting half on the new panel and half on the original window. This would work OK but the lead would be slanted across it’s width.).
There are a couple of things to keep in mind when using this technique.
As normal when leading, you want to end up with as few “lose ends” as possible. The normally means making sure you finis with the pieces at the edge.
Also, there are gaps between the glass panels. You will need to ensure that “spare” lead is added where necessary so again there aren’t big dips when you add the long pieces. (This sounds a bit complicated but you can see what I mean in the video)

Steps.
Here are the steps I took to add the panels.
First I edged the whole window in 3mm lead. This was originally going to be 4.5mm but I had to change it due to an error with measuring.
Next, I too the bottom panel and placed it against the lead at the bottom of the window. Using this as a measure I ran a piece if 4.5mm lead along the top, sticking it to the original window. Then I took a piece of 9mm lead and stuck that along the top, half on the new panel and half on the 4.5mm lead. (Please not I did NOT do the 9mm lead along the bottom at this stage).
This was repeated with the panel at the top of the window EXCEPT this time I added the 9mm to the bottom of the panel and not too the top.
The large top panel came next. This was again the same technique except this time I could add the 9mm lead to both the top and bottom.
The final 3 panels to add went across the remaining space. Again I first added 4.5mm strips of lead at the top and the bottom. These went right across even though there would be gaps between the glass panels. I then started with the left panel, putting on the 9mm lead to fix it to the window. When I came to the edge of this frist panel I added an extra piece of 4.5mm lead so the 9mm lead didn’t sink too far. (Again this is much clearer in the video than trying to put it into words!). I carried on like this to add the next two panels. When adding the middle panel I ensured it was lined up to the design above and below.

Now we are almost ready to add the long vertical strips. First however we need to ensure they can run down smoothly without dipping too far anywhere. For this we need to add 3.5mm each side of the centre panel we have just placed plus to the left of the righthand panel and the right of the lefthand panel. (You may need to read that bit twice!). We also need to add some small pieces of 9mm lead in the horizontal gaps between the glass panels. Once that has been done we are ready to run the six long piece down from top to bottom. At all times these long strips should be going across either a glass panel or half on a glass panel and half on 3.5mm lead or across with of the extra small 9mm lead pieces we put on.
The next part is to add the 9mm strips to horizontally across the top and bottom. These should go over the ends of all the vertical strips and finish them off.
Finally go all over the piece smoothing down the lead and cutting off any “spare bits”.
Summery.
I know the instructions above seem really complicated but it does all become much clearer when you are either watching the video or doing it yourself. It is just a very difficult process to put into words.
As normal you don’t have to stick to our design. The same technique can be used with any other design you either find or create.


Sir, adding the lead strips is something very new for me, is there a very basic tutorial on this, and also some links to know where I can find them. This way of window glass is very inspiring, thanks for sharing it.
This article is all about using adhesive lead: https://www.glasspainting.co.uk/glass-painting-guides/using-adhesive-lead-in-glass-painting.
Not sure what country you are in but this site is good: https://www.leaddiyshop.com/lead-strip