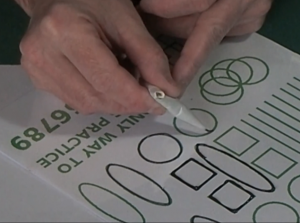
We are starting our course with a lesson on basic outlining. Probably the part of glass painting which most people have an issue with. The outlining is important. Do it well and the painting will just follow but if it looks “poor” it won’t matter how well you paint the piece, it will still look poor.
Please don’t expect your outlining to look good right away. As with many crafts it take practice over a period of time. You should also start slowly, you can speed up when you feel more confident.
Lesson 1. Basic Outlining Video.
We start our basic outlining lesson by looking at two less used methods, adhesive lead and peelies. These will be looked at more closely in future lessons. The main part of the lesson looks at how to use liquid outliner, sometimes called contour paste or relief. It comes in two types, hard and soft, both of which are available in different colours. Generally the hard outliner comes in tubes and the softer outliner in bottles but be careful because this isn’t always the case.
When to use different outliners.
Generally I use the softer outliners for my work. It can be purchased in large bottles which makes it cost effective and I find it nice to work with. As with most glass painting it can be washed down but shouldn’t be soaked. Whilst most of the time it really doesn’t matter which outliner you use there are certain circumstnces were only one will suit.
If the outline is going to be “free standing” e.g. it isn’t going to be painted then you will need to use the harder outliner. This would include using it to write on a glass or outlining on the TOP of paint (overpiping). Generally the paint will seal the softer outliner onto the glass so you shouldn’t use it without paint.
If you are using peelable glass paints which you intend to peel and move when finished the you will need to use one of the soter (peelable) outliners.
Tips:
The basic technique is “Touch… lift and pull”. Never be tempted to push the outliner as it comes out of the bag or bottle. Also don’t scrall the tip along the surface, you won’t get a smooth line.
Whenever possible I use a piping bag as it gives me most control. Bottles are OK depending on how soft they are. Tubes tend to be difficult as the outliner doesn’t stop coming out when you stop pressing!
Practice Sheets.
Here are the two practice sheets we use in the video. Just click on them and then when the larger image appears right click on it and save it onto your computer. You can then print it out whenever you want.
I hope this video gives you a good idea of the basics of outlining. We will return to it in future videos and show you some different techniques you can use when doing specific types of glass painting.


Great video
Thank you.
THANKS SO MUCH. I FEEL MORE SURE ALREADY.
Thank you so much for your time and patience in teaching your art. I found you by accident one day and enjoy your accent. I am very excited in starting some of the fun glass painting. Thanks again.
Glad you are enjoying the site.
Thanks so much for your time and patience in teaching your talents. I also love your accent. I am looking forward to learn more and being able to do some of my own glass painting. Thanks again.
New hobby. Great tutorials.
Do you sell supplies or have you a preferred supplier.
Thanks Gerry
Hi Gerry,
I just sell a few extras every now and then but nothing regular 🙂
Are you in the UK or elsewhere?
Thank you sooooo much for your fabulous videos.
I’ve never considered myself an artist but this has opened up a whole new, inspiring world for me.
Thank you for your comment Nicky. Like you I don’t consider myself much of an artist, I can’t draw freehand at all! The nice thing about glass painting is you are copying a design and that design can come from anywhere. I tend to look for designs on the Internet and then play around with them on my computer to make something the shape and size I need.